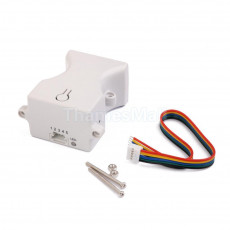
I have read pretty confusing (at least to me) descriptions on how to connect a DYP-ME007 Ultrasound Range finder, and it's really dead simple. Ditto the I2C LCD. I use a DFRobot LCD. No resistors, pull-up, -down or any other direction are needed

. You do need the LiquidCrystal_I2C on your path (get it from
http://hmario.home.xs4all.nl/arduino/LiquidCrystal_I2C/LiquidCrystal_I2C.zip here and unzip it to the libraries subfolder of your arduino development environment folder (the subfolder of the one that contains the arduino.exe). The DYP-ME007 has 5 pins, and you'll need only four: Vin, GND, TRIG and ECHO. Vin and GND are obvious and for teh script here, TRIG goes on digital 2 and ECHO to digital 3, but you choose. The LCD I2C is really simple too. Just connect Vin and GND, the SCL clock line goes on analog 5 and the SDA data line on analog 4. Hook it all up, connect your board to USB, upload this script and enjoy

/* This Arduino script uses the DYP-ME007 Ultrasound Range finder to
* measure distance in cm and displays the distance on a DFRobot
* I2C LCD Module 508040.
* Hardware: Connect the DYP-ME007 to +5V and Ground, and
* the dypOutputPin to the DYP_ME007 "Trig" pin and the
* the dypInputPin to the DYP-ME007 "Echo" pin.
* By default I2C chips use analog pin A4 for data SDA and A5
* for the clock SCL. Of course 5V and GND need to be connected too.
* Credits to DFRobot and Bexilino on http://arduino.cc/forum/index.php?topic=60973.0
* from which I have copied parts.
*/
#include <Wire.h>
#include <LiquidCrystal_I2C.h>
LiquidCrystal_I2C lcd(0x27,16,2); // set the LCD address to 0x27 for a 16 chars and 2 line display
int dypOutputPin = 2; // TRIG
int dypInputPin = 3; // ECHO
long distance;
long cm;
void setup(){
pinMode(dypOutputPin, OUTPUT);
pinMode(dypInputPin,INPUT);
lcd.init(); // initialize the lcd
lcd.backlight();
}
void loop()
{
// The DYP-ME007 pings on the low-high flank...
digitalWrite(dypOutputPin, LOW);
delayMicroseconds(2);
digitalWrite(dypOutputPin, HIGH);
delayMicroseconds(10);
digitalWrite(dypOutputPin, LOW);
// the distance is proportional to the time interval
// between HIGH and LOW
distance = pulseIn(dypInputPin, HIGH);
cm= distance/58;
lcd.clear();
lcd.print(cm);
delay(100); // avoids LCD flicker
}
 . You do need the LiquidCrystal_I2C on your path (get it fromhttp://hmario.home.xs4all.nl/arduino/LiquidCrystal_I2C/LiquidCrystal_I2C.zip here and unzip it to the libraries subfolder of your arduino development environment folder (the subfolder of the one that contains the arduino.exe). The DYP-ME007 has 5 pins, and you'll need only four: Vin, GND, TRIG and ECHO. Vin and GND are obvious and for teh script here, TRIG goes on digital 2 and ECHO to digital 3, but you choose. The LCD I2C is really simple too. Just connect Vin and GND, the SCL clock line goes on analog 5 and the SDA data line on analog 4. Hook it all up, connect your board to USB, upload this script and enjoy


